


ansible架构
先配置好密钥认证
主机清单:通过主机清单(inventory/hosts)连接管理被控端
ad-hoc:命令执行模块
playbook:使用剧本
ansible 工具安装
#0.安装pip工具
yum install -y python3-pip

#1.升级pip
python3 -m pip install -i https://mirrors.tuna.tsinghua.edu.cn/pypi/web/simple --upgrade pip

#2.pip源(加速pip下载软件)
pip3 config set global.index-url https://mirrors.tuna.tsinghua.edu.cn/pypi/web/simple

#3.安装ans
pip3 install  ansible

#4.配置ans
mkdir -p /etc/ansible/
cat >/etc/ansible/ansible.cfg<<'EOF'
[defaults]
host_key_checking = False      #连接机器时yes/no的提示
deprecation_warnings = False
interpreter_python=/usr/bin/python3
[inventory]
[privilege_escalation]
[paramiko_connection]
[ssh_connection]
[persistent_connection]
[accelerate]
[selinux]
[colors]
[diff]
EOF

vim /etc/ansible/hosts
#主机清单
#分组,模块不能与主机名重复
[lb]
172.16.1.5
172.16.1.6

[web]
172.16.1.[7:10]

[nfs]
172.16.1.31

[bak]
172.16.1.41

[db]
172.16.1.51
172.16.1.52

#创建子组,将组合并,原来的组也能正常使用
[data:children]
db
nfs
bak
sudo apt update
sudo apt install -y software-properties-common
sudo add-apt-repository --yes --update ppa:ansible/ansible
apt -y install ansible
mkdir -p /etc/ansible/
cat >/etc/ansible/ansible.cfg<<'EOF'
[defaults]
host_key_checking = False #连接机器时yes/no的提示
deprecation_warnings = False
interpreter_python=/usr/bin/python3
[inventory]
[privilege_escalation]
[paramiko_connection]
[ssh_connection]
[persistent_connection]
[accelerate]
[selinux]
[colors]
[diff]
EOF
mkdir -p /server/ansible
vim /server/ansible/hosts
#主机清单
#分组,模块不能与主机名重复
[lb]
172.16.1.5
172.16.1.6
[web]
172.16.1.[7:10]
[nfs]
172.16.1.31
[bak]
172.16.1.41
[db]
172.16.1.51
172.16.1.52
#创建子组,将组合并,原来的组也能正常使用
[data:children]
db
nfs
bak多台机器,密码不同如何搞定?
写个密码文件,读取密码文件,再去分发密钥
密码写在主机清单中
批量管理项目流程
1.主机清单文件
a 分组
b 数量少可以手动创建主机的清单文件
c 数量多可以使用范围功能 172.16.1.[5:50]
d 如果用户名密码端口不统一,书写脚本读取 while read
e 创建主机清单文件
2.测试 -m ping
3.根据需求执行剧本
mkdir -p /server/ansible/
mv /etc/ansible/hosts  /server/ansible/
cd /server/ansible/
vim hosts

[web]
10.0.0.7 ansible_user=root ansible_port=22 ansible_password=Lidao996
10.0.0.8 ansible_user=root ansible_port=22 ansible_password=Lidao996

#测试
[root@m01 ansible]# ansible -i /server/ansible/hosts web -m ping
/usr/local/lib/python3.7/site-packages/ansible/parsing/vault/__init__.py:44: CryptographyDeprecationWarning: Python 3.7 is no longer supported by the Python core team and support for it is deprecated in cryptography. The next release of cryptography will remove support for Python 3.7.
  from cryptography.exceptions import InvalidSignature
172.16.1.7 | SUCCESS => {
    "changed": false,
    "ping": "pong"
}
172.16.1.9 | SUCCESS => {
    "changed": false,
    "ping": "pong"
}
172.16.1.10 | SUCCESS => {
    "changed": false,
    "ping": "pong"
}
172.16.1.8 | SUCCESS => {
    "changed": false,
    "ping": "pong"
}
#1.根据文件内容all_pass.txt(事先写好的)
ip 用户名 密码 linux
ip 用户名  密码 win
192.168.1.5 root 123456 linux
#2.生成书写一个脚本生成主机清单文件

#!/bin/bash
#author:
#desc: 读取密码文件批量创建主机清单文件.
i=0
j=0

while read  ip  user  pass type
do
  if [ "$type" = "linux"  ];then
    if [ $i -eq 0 ];then
       echo [linux_servers]    >>  linux_hosts
       i=1
    fi
    echo $ip    ansible_user=$user   ansible_port=22  ansible_password=$pass   >> linux_hosts
  fi
    if [ "$type" = "win"  ];then
      if [ $j -eq 0 ];then
       echo [win_servers]    >>  win_hosts
       j=1
    fi
    echo $ip    ansible_user=$user   ansible_port=22  ansible_password=$pass   >>  win_hosts
  fi
done  <linux_pass.txt

cat linux_hosts  win_hosts  >all_hosts

#如何涉及主机名修改
#需要对ip地址进行判断
# 3-6    lb
#7-10    web
i=1
#100-200  web

------------------------------------------------------
#主机清单内容举例:
[linux_servers]
10.0.0.9    ansible_user=root   ansible_port=22  ansible_password=xxxx
10.0.0.9   ansible_user=root   ansible_port=22  ansible_password=xxxx
10.0.0.9   ansible_user=root   ansible_port=22  ansible_password=xxxx
10.0.0.9   ansible_user=root   ansible_port=22  ansible_password=xxxx
10.0.0.9   ansible_user=root   ansible_port=22  ansible_password=xxxx
10.0.0.9   ansible_user=root   ansible_port=22  ansible_password=xxxx
10.0.0.9   ansible_user=root   ansible_port=22  ansible_password=xxxx

[win_servers]
10.0.0.10   ansible_user=administrator     ansible_password=xxxx
10.0.0.10   ansible_user=administrator     ansible_password=xxxx
10.0.0.10   ansible_user=administrator     ansible_password=xxxx
10.0.0.10   ansible_user=administrator     ansible_password=xxxx
10.0.0.10   ansible_user=administrator     ansible_password=xxxx
10.0.0.10   ansible_user=administrator     ansible_password=xxxx

[win_servers:vars]
ansible_connection="winrm"
ansible_port=5985
#5985 http
#5986 https
ansible_winrm_transport="ntlm"
ansible_winrm_server_cert_validation=ignore

#管理机安装winrm模块
yum install python-winrm  #如果ansible是python3安装 python3-winrm
或者
pip install  pywinrm       #如果ansible是python3安装   pip3 install pywinrm

#ping检查
#1. 检查linux
ansible  -i hosts  -f 50   linux_servers   -m ping

#2. 检查windows
ansible  -i hosts  -f 50   linux_servers   -m win_ping
#-f  forks  并发数,默认是5.
ansible 模块:
剧本中的变量
主机名: {{ ansible_hostname }}
所有ip: {{ ansible_all_ipv4_addresses }}
内存总大小: {{ansible_memtotal_mb}}
系统发行版本: {{ansible_distribution}}
系统版本:  {{ansible_distribution_major_version }}
cpu架构: {{ ansible_architecture }}
系统版本昵称: {{ ansible_distribution_release }}
第1块网卡的ip地址: {{ ansible_default_ipv4.address }}
#添加多用户密码/创建多目录
#用loop循环引用的变量,引用时用{{item}}
- hosts: all
tasks:
- name: 1.添加用户名设置密码
user:
name: "{{item.username}}"
uid: "{{item.uid}}"
password: "{{item.password |password_hash('sha512','fanxuxu') }}"
loop:
- { username: "lidao666",uid: "8848",password: "oldboy123" }
- { username: "fanxuxu",uid: "6666",password: "Fanxuxu666" }
#创建多目录
- hosts: all
tasks:
- name: 1.添加用户名设置密码
files:
path: "{{item}}"
state: directory
loop:
- '/dir01/dir02/'
- '/lidao/qqq/'
- '/app/code/'
----------------------------------------------------
#列表变量
- hosts: db
vars:
dirs:
- '/lidao/linshi/'
- '/oldbot/code/'
tasks:
- name: 批量创建目录
file:
path: "{{item}}"
state: directory
loop: "{{dirs}}"- hosts: ubt,db
vars:
rsync_server:
ip: 10.0.0.201
user: rsync
dirs:
- '/lidao/'
- '/oldboy/'
- '/app/code/bird/'
- '/app/code/blog/'
tasks:
- name: 0.添加用户
user:
name: "{{ rsync_server.user }}"
state: present
- name: 1.批量创建目录
file:
path: "{{ item }}"
owner: "{{ rsync_server.user }}"
state: directory
loop: "{{ rsync_server.dirs }}"
- name: 2.ip_dir
file:
path: "/tmp/{{ rsync_server.ip }}"
state: directory #通常用在分发配置文件,文件有改动变化,触发重新加载配置文件
#举例:在nginx剧本部署中,书写或分发配置文件部分用notify埋雷,
# 当配置文件发生改动时,会触发最底部的handers模块重新加载配置文件
- name: 3.修改nginx主配置文件
lineinfile:
path: /etc/nginx/nginx.conf
regexp: "^user"
line: "user {{user_name}};"
state: present
notify: #(与name对齐)
- reload_nginx
- name: 4.修改nginx子配置文件
copy:
src: /files/bird.conf
dest: /etc/nginx/conf.d/bird.conf
notify:
- reload_nginx
......
handlers: #(与tasks对齐)
- name: reload_nginx
systemd:
name: nginx
state: reloaded
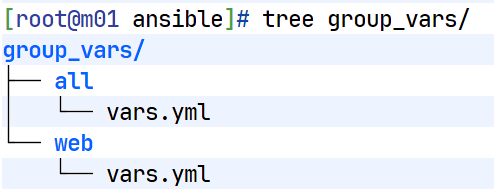
group_vars 分组变量
- hosts: all
  tasks:
    - name: 1.获取命令执行结果,创建变量
      shell: hostname -I |awk '{print $1}'
      register: ip   #将shell执行的结果定义为一个变量
    - name: 2.调试,输出变量
      debug:
        msg: |
          "正常输出{{ip.stdout}}"   #直接调用name会输出很多,所以这个是标准输出
          "返回值{{ip.rc}}"
    - name: 3.创建目录
      file:
        path: /linshi/{{ip.stdout}}
        state: directory
----------------------
cat hosts
[lb]
172.16.1.5   hostname=kylin-lb01
172.16.1.6   hostname=kylin-lb02

[web]
172.16.1.[7:10]

[nfs]
172.16.1.31  hostname=kylin-nfs01

[bak]
172.16.1.41  hostname=kylin-bak01

[db]
172.16.1.51  hostname=kylin-db01
172.16.1.52  hostname=kylin-db02

----- #主机清单里面定义主机名变量-----------------------------
- hosts: all
  tasks:
    - name: 修改主机名
      hostname:
        name: "{{hostname}}"
        use: systemd
[lb]
172.16.1.5 hostname=kylin-lb01
172.16.1.6 hostname=kylin-lb02
[web]
172.16.1.[7:10]
[nfs]
172.16.1.31 hostname=kylin-nfs01
[bak]
172.16.1.41 hostname=kylin-bak01
[db]
172.16.1.51 hostname=kylin-db01
172.16.1.52 hostname=kylin-db02
[lb:vars]
password=Lidao996
[web:vars]
password=Lidao007
[db:vars]
password=xxxxx
--------------------------------------
- hosts: lb:web
tasks:
- name: 修改密码
user:
name: oldboy
password: "{{ password | password_hash('sha512') }}"
state: present- hosts: all
gather_facts: true
tasks:
- name: 1.红帽类系统
yum:
name: tree,telnet,nmap,nc
state: latest
when: ansible_distribution is match("Kylin|Centos|Rocky")
- name: 2.ubt系统安装
apt:
name: lolcat,lrzsz,cmatrix
state: latest
when: ansible_distribution is match("Ubuntu")
--------------------------------------------
- name: 3.检查配置文件
shell: nginx -t
register: check_conf
failed_when: check_conf.rc != 0
分发小差别的配置文件,分发lb01/lb02
分发模板:./template/keepalived.conf.j2
Keepalived 模板配置(keepalived.conf.j2):
global_defs {
  router_id {{ansible_hostname}}
}
vrrp_instance lb_vip_3 {

  {% if ansible_hostname ~ "lb01" %}
    state  MASTER
    priority 100
  {% elif ansible_hostname ~ "lb02" %}
    state  BACKUP
    priority 50
  {% endif %}

  interface ens33
  virtual_router_id 51
  advert_int 1
  authentication {
    auth_type PASS
    auth_pass 1111
  }
  virtual_ipaddress {
    10.0.0.3/24 dev ens33  label ens33:1
  }
}

剧本:
- hosts: lb
  gather_facts: true
  tasks:
    - name: 分发配置文件
      template:
        src: templates/keepalived.conf.j2
        dest: /tmp/keepalived.conf
剧本:cat nfs_exports.yml
- hosts: nfs
  tasks:
    - name: template exports file
      template:
        src: ./template/exports.j2
        dest: /tmp/exports
./template/exports.j2 模板文件
{% for dir in nfs_dirs %}
#nfs服务端目录 {{ dir }}
{{dir}}    172.16.1.0/24(rw,all_squash)
{% endfor %}
cat group_vars/nfs/vars.yml
nfs_dirs:
  - /nfsdata/
  - /nfs/pics/
  - /nfs/blog/
  - /nfs/zrlog/
调试
--syntax-check 语法检查,不运行
-C 模拟运行与检查
--start-at-task 【任务名】(从指定任务开始执行)
-vvv 也是检查,但是太复杂
标签调试:(选择哪个任务执行,跳过哪个任务)
#在剧本中定义:
tags:(与 name 同级)
- 【定义标签】
#应用:
--list-tasks (显示标签)
-t 【标签】(执行哪个任务)
--skip-tags 【标签】(跳过哪个任务)
命令行应用练习
#测试主机连通性
ansible -i hosts all -m ping

#创建目录/linshi/ans
ansible -i hosts web -m file -a 'path=/linshi/ans state=directory'

#创建文件/linshi/ans/1.txt
ansible -i hosts web -m file -a 'path=/linshi/ans/1.txt state=touch'

#删除/linshi/ans(极其危险)
ansible -i hosts web -m file -a 'path=/linshi/ans state=absent'

#创建软链接,源/etc/sysconfig/network-scriptss/ifcfg-ens33 目的ens33
ansible -i hosts web -m file -a 'src=/etc/sysconfig/network-scriptss/ifcfg-ens33 path=/root/ens33 state=link'

#添加用户
 ansible -i hosts all -m user -a 'name=lidao state=present'

#添加虚拟用户
ansible -i hosts all -m user -a 'name=www-web shell="/sbin/nologin" create_home=false state=present'

#添加虚拟用户,指定uid/gid
ansible -i hosts web:nfs -m group -a 'name=www-nfs gid=2999  state=present'
ansible -i hosts web:nfs -m user -a 'name=www-nfs uid=2999 group=www-nfs shell="/sbin/nologin" create_home=false  state=present'
#检查
ansible -i hosts web:nfs -a 'grep www-nfs /etc/passwd'
172.16.1.7 | CHANGED | rc=0 >>
www-nfs:x:2999:2999::/home/www-nfs:/sbin/nologin
172.16.1.9 | CHANGED | rc=0 >>
www-nfs:x:2999:2999::/home/www-nfs:/sbin/nologin
172.16.1.10 | CHANGED | rc=0 >>
www-nfs:x:2999:2999::/home/www-nfs:/sbin/nologin
172.16.1.31 | CHANGED | rc=0 >>
www-nfs:x:2999:2999::/home/www-nfs:/sbin/nologin
172.16.1.8 | CHANGED | rc=0 >>
www-nfs:x:2999:2999::/home/www-nfs:/sbin/nologin

#递归修改权限/属主属组
ansible -i hosts web -m file -a 'path=/linshi/ owner=www-nfs group=oldboy recurse=true state=directory'

#安装软件
ansible -i hosts all -m yum -a 'name=netstatus state=present'

#传输/分发文件(原文件备份),但最好不要传输目录(极其缓慢)
ansible -i hosts all -m copy -a 'src=/etc/hosts dest=/etc/hosts backup=true'

#服务的管理-启动、停止、开机自启等
ansible -i hosts all -m systemd -a 'name=firewalld enabled=false state=stopped'

#更改密码
 ansible -i hosts  172.16.1.51  -m user -a "name=lidao password={{ 'oldboy'|password_hash('sha512', 'suibianxie') }}  state=present "
playbook 剧本
#剧本通常以 .yml 或 .yaml 结尾,对齐要用空格,禁止使用 tab 键
#-与模块之间要有空格
#剧本的格式:
---
- hosts:all   #主机清单中分组
   tasks:  #任务
    - name:01 打开冰箱门     #命令
      shell:echo 01 open >>/tmp/bingxiang.log
    - name:02 把大象放入冰箱
      shell:echo 02 put >>/tmp/bingxiang.log
    - name:03 关上冰箱门
      shell:echo 03 close >>/tmp/bingxiang.log
- hosts: all
vars:
user_name: "lidao"
user_pass: "Oldboy12306"
tasks:
- name: 1.添加用户并修改密码
user:
name: "{{ user_name }}"
password: "{{ user_pass | password_hash('sha512','nigebendan')}}"
state: present
#查询版本: yum list available nginx --showduplicates
- name: fanxuxu
  hosts: all
  gather_facts: yes
  vars:
    user_name: www
    user_name_uid: 1999
    user_name_gid: 1999
    fenfa_dir: /files/bird.tar.gz
    install_dir: /app/code/
  tasks:
    - name: 1.配置yum源(copy也可以)
      yum_repository:
        name: ngx
        description: nginx stable repo ansible fanxuxu
        baseurl: http://nginx.org/packages/centos/7/$basearch/
        gpgcheck: false
        enabled: true
        state: present

    - name: 2.安装nginx[控制版本]
      yum:
        name: "nginx-1:1.21.5-2.p05.ky10"
        state: present
      become: yes

    - name: 3.修改nginx主配置文件
      lineinfile:
        path: /etc/nginx/nginx.conf
        regexp: "^user"
        line: "user {{user_name}};"
        state: present
      notify:
        - reload_nginx

    - name: 4.修改nginx子配置文件
      copy:
        src: /files/bird.conf
        dest: /etc/nginx/conf.d/bird.conf
      notify:
        - reload_nginx

    - name: 5.添加用户组 gid
      group:
        name: "{{user_name}}"
        gid: "{{user_name_gid}}"
        state: present

    - name: 6.添加用户
      user:
        name: "{{user_name}}"
        uid: "{{user_name_uid}}"
        group: "{{user_name}}"
        shell: /sbin/nologin
        create_home: false
        state: present

    - name: 7.创建站点目录
      file:
        path: "{{install_dir}}"
        owner: root
        group: root
        state: directory

    - name: 8.分发代码压缩包与解压
      unarchive:
        src: "{{fenfa_dir}}"
        dest: "{{install_dir}}"
        owner: "{{user_name}}"
        group: "{{user_name}}"

    - name: 9.启动nginx
      systemd:
        name: nginx
        enabled: true
        state: started
  handlers:
    - name: reload_nginx
      systemd:
        name: nginx
        state: reloaded
---
- name: Tomcat deploy install by fanxuxu
gather_facts: yes
hosts: all
become: true
vars_prompt:
- name: tomcat_version
prompt: "请选择要安装的 Tomcat 版本 (9 / 10 / 11)"
private: no
vars:
download_dir: /tmp
install_dir: /app/tools
service_file: /usr/lib/systemd/system/tomcat.service
tomcat_urls:
9: "https://mirrors.tuna.tsinghua.edu.cn/apache/tomcat/tomcat-9/v9.0.111/bin/apache-tomcat-9.0.111.tar.gz"
10: "https://mirrors.aliyun.com/apache/tomcat/tomcat-10/v10.1.46/bin/apache-tomcat-10.1.46.tar.gz"
11: "https://mirrors.aliyun.com/apache/tomcat/tomcat-11/v11.0.11/bin/apache-tomcat-11.0.11.tar.gz"
tasks:
- name: 检查网络连通性
ansible.builtin.command: ping -c 3 223.5.5.5
register: ping_result
failed_when: ping_result.rc != 0
ignore_errors: no
- name: 检查并关闭防火墙(CentOS)
ansible.builtin.service:
name: firewalld
state: stopped
enabled: no
when: ansible_facts['os_family'] == "RedHat"
- name: 检查并关闭防火墙(Ubuntu/Debian)
ansible.builtin.service:
name: ufw
state: stopped
enabled: no
when: ansible_facts['os_family'] == "Debian"
- name: 安装 OpenJDK 依赖 (红帽 系)
ansible.builtin.package:
name: "{{ 'java-11-openjdk' if tomcat_version in ['9','10'] else 'java-17-openjdk' }}"
state: present
when: ansible_distribution is match("Kylin|Centos|Rocky|RedHat")
- name: 安装 OpenJDK 依赖 (Debian 系)
ansible.builtin.package:
name: "{{ 'openjdk-11-jdk' if tomcat_version in ['9','10'] else 'openjdk-17-jdk' }}"
state: present
when: ansible_distribution is match("Debian|Ubuntu")
- name: 创建下载目录
file:
path: "{{ download_dir }}"
state: directory
recurse: yes
- name: 创建安装目录
file:
path: "{{ install_dir }}"
state: directory
recurse: yes
- name: 下载 Tomcat 压缩包
ansible.builtin.get_url:
url: "{{ tomcat_urls[tomcat_version | int] }}"
dest: "{{ download_dir }}/"
mode: '0644'
- name: 解压 Tomcat
ansible.builtin.unarchive:
src: "{{ download_dir }}/{{ tomcat_urls[tomcat_version | int] | basename }}"
dest: "{{ install_dir }}"
remote_src: true
creates: "{{ install_dir }}/apache-tomcat-{{ tomcat_version }}*"
- name: 创建软链接 /app/tools/tomcat
ansible.builtin.file:
src: "{{ install_dir }}/{{ (tomcat_urls[tomcat_version | int] | basename) | regex_replace('\\.tar\\.gz$', '') }}"
dest: "{{ install_dir }}/tomcat"
state: link
force: true
- name: 赋予可执行权限
ansible.builtin.file:
path: "{{ install_dir }}/tomcat/bin"
recurse: true
mode: '0755'
- name: 创建 systemd 服务文件
ansible.builtin.copy:
dest: "{{ service_file }}"
content: |
[Unit]
Description=Tomcat by fanxuxu
After=network.target
[Service]
Type=forking
ExecStart={{ install_dir }}/tomcat/bin/startup.sh
ExecStop={{ install_dir }}/tomcat/bin/shutdown.sh
[Install]
WantedBy=multi-user.target
mode: '0644'
- name: 重新加载 systemd 守护进程
ansible.builtin.command: systemctl daemon-reload
- name: 启动并设置 tomcat 开机自启
ansible.builtin.service:
name: tomcat
state: started
enabled: yes
- name: 确认 net-tools 是否安装
ansible.builtin.package:
name: net-tools
state: present
- name: 检查 Tomcat 8080 端口
ansible.builtin.shell: "netstat -tuln | grep 8080"
register: port_check
failed_when: port_check.rc != 0
changed_when: false
- name: 输出 Tomcat 访问信息
ansible.builtin.debug:
msg: "Tomcat {{ tomcat_version }} 安装完成,可访问:http://{{ ansible_default_ipv4.address }}:8080"
#rsync配置文件分发:
cat templates/rsyncd.conf.j2
fake super = yes
uid = rsync
gid = rsync
use chroot = no
max connections = 2000
timeout = 600
pid file = /var/run/rsyncd.pid
lock file = /var/run/rsync.lock
log file = /var/log/rsyncd.log
ignore errors
read only = no
list = yes
#hosts allow = 172.16.1.0/24
#hosts deny = 0.0.0.0/32
#####################################
{% for dir in rsync_server_dirs %}
[{{dir.name}}]
comment = {{dir.name}} rsync by fanxuxu
path = {{dir.dir}}
{% endfor %}
------------------------------------------------------
--- #部署rsync服务端
- hosts: all
  gather_facts: yes
  tasks:
    - name: 1.1红帽安装rsync
      yum:
        name: rsync
        state: latest
      when: ansible_distribution is match("Kylin|Centos|Rocky")

    - name: 1.2Debian安装rsync
      apt:
        name: rsync
        state: latest
      when: ansible_distribution is match("Debian|Ubuntu")


    - name: 2.分发配置文件
      template:
        src: ./templates/rsyncd.conf.j2
        dest: /etc/rsyncd.conf
        backup: true
      notify:
        - 'restart_rsync'

    - name: 3.添加用户
      user:
        name: "{{owner_user}}"
        shell: /sbin/nologin
        create_home: false
        state: present

    - name: 4.创建共享目录,所有者
      file:
        path: "{{ item.dir }}"
        mode: 0755
        owner: "{{owner_user}}"
        group: "{{owner_user}}"
        state: directory
      loop: "{{ rsync_share_dirs }}"

    - name: 5.密码文件,权限
      lineinfile:
        path: "{{rsync_passwd_file}}"
        line: " {{rsync_user}}:{{rsync_passwd}}"
        mode: 0600
        owner: root
        group: root
        create: true  #指定的文件不存在时自动创建

    - name: 6.1红帽启动服务
      systemd:
        name: rsyncd
        enabled: true
        state: started
      when: ansible_distribution is match("Kylin|Centos|Rocky")

    - name: 6.2Debian启动服务
      systemd:
        name: rsync
        enabled: true
        state: started
      when: ansible_distribution is match("Ubuntu|Debian")

  handlers:
    - name: restart_rsync
      systemd:
        name: rsyncd
        state: restarted

# 定时备份--------------------------------
# rsync 客户端,手动修改server_ip
- hosts: all
  vars_prompt:
    - name: server_ip
      prompt: "请输入服务端内网IP (例如:172.16.1.51)"
      private: no

  tasks:
    - name: 1.1红帽安装rsync
      yum:
        name: rsync
        state: latest
      when: ansible_distribution is match("Kylin|Centos|Rocky")

    - name: 1.2Debian安装rsync
      apt:
        name: rsync
        state: latest
      when: ansible_distribution is match("Debian|Ubuntu")

    - name: 2.创建脚本目录
      file:
        path: /server/scripts/
        state: directory

    - name: 3.临时共享目录
      file:
        path: "{{rsync_client.share_dir}}"
        state: directory

    - name: 4.分发脚本
      template:
        src: ./templates/cron+rsync_backup.sh.j2
        dest: /server/scripts/cron+rsync_backup.sh

    - name: 5.添加定时任务
      cron:
        name: 每日定时备份
        minute: "00"
        hour:   "00"
        job: "bash /server/scripts/cron+rsync_backup.sh"
        state: present
-------------------------------------------------------
定时任务:cat cat templates/cron+rsync_backup.sh.j2
#!/bin/bash
#作者:fanxuxu_Cheer
#说明:带有时间的备份脚本,打包
#版本:v1.0

#1.变量
time=$(date +%F_%w_%H)
ip=$(hostname -I |awk '{print $2}')
bk_dir=/backup/${ip}/

#2.检查
if [ -z "${ip}" ];then
        echo "没有获取到IP地址"
        exit 2
fi

#创建目录
[ ! -d "${bk_dir}" ] && mkdir -p $bk_dir

#2.tar要备份的文件
tar zcf ${bk_dir}etc-$time.tar.gz /etc/ >/dev/null 2>&1
tar zcf ${bk_dir}cron-$time.tar.gz /var/spool/cron/ >/dev/null 2>&1
tar zcf ${bk_dir}log-$time.tar.gz /var/log/ >/dev/null 2>&1
tar zcf ${bk_dir}root-$time.tar.gz /root/ >/dev/null 2>&1
tar zcf ${bk_dir}home-$time.tar.gz /home/ >/dev/null 2>&1
tar zcf ${bk_dir}lib-$time.tar.gz /var/lib/ >/dev/null 2>&1

#统一验证
for file in ${bk_dir}*-$time.tar.gz; do
    if [ ! -s "$file" ]; then
        echo "❌ 发现未生成或空文件:$file"
        exit 5
    fi
done
echo "✅ 所有目录打包验证通过"

#3.md5验证文件
md5sum ${bk_dir}{etc,cron,log,root,home,lib}-$time.tar.gz > ${bk_dir}conf-${time}.md5


#4.定时同步备份
#/backup/ 同步目录下的文件
#/backup  同步目录+目录内容
RSYNC_PASSWORD=1 rsync -avz {{rsync_client.share_dir}} {{vars.rsync_user}}@{{server_ip}}::{{rsync_client.mod}}
if [ $? -eq 0 ];then
        echo "同步备份成功"
else
        echo "同步备份失败,请手动检查"
        exit 3
fi

#5.定时清理7天前的备份
find ${bk_dir} -type f -name "*.tar.gz" -mtime +7 |xargs rm -f
---
- name: One-key NFS server deployment by fanxuxu
  hosts: all
  become: true
  gather_facts: yes

  vars_prompt:
    - name: nfs_share_dir
      prompt: "请输入共享目录路径 (默认: /nfsdata)"
      private: no
      default: "/nfsdata"

    - name: nfs_user
      prompt: "请输入 NFS 用户名 (默认: www)"
      private: no
      default: "www"

    - name: nfs_uid
      prompt: "请输入 NFS 用户 UID (默认: 1999)"
      private: no
      default: "1999"

    - name: nfs_gid
      prompt: "请输入 NFS 用户 GID (默认: 1999)"
      private: no
      default: "1999"

    - name: nfs_network
      prompt: "请输入允许访问的网段 (例如 172.16.1.0/24)"
      private: no

  vars:
    nfs_exports_file: /etc/exports

  tasks:
    - name: "1. 安装 NFS 服务端(RedHat/Kylin/CentOS/Rocky 系)"
      yum:
        name:
          - nfs-utils
          - rpcbind
        state: present
      when: ansible_os_family == "RedHat"

    - name: "2. 安装 NFS 服务端(Debian/Ubuntu 系)"
      apt:
        name:
          - nfs-kernel-server
          - rpcbind
        state: present
        update_cache: yes
      when: ansible_os_family == "Debian"

    - name: "3. 确保 /etc/exports 文件存在"
      file:
        path: "{{ nfs_exports_file }}"
        state: touch
        mode: '0644'

    - name: "4. 备份旧 exports 文件"
      copy:
        src: "{{ nfs_exports_file }}"
        dest: "{{ nfs_exports_file }}.bak_{{ ansible_date_time.date }}"
        remote_src: yes
      when: nfs_exports_file is file

    - name: "5. 创建共享目录"
      file:
        path: "{{ nfs_share_dir }}"
        state: directory
        mode: '0755'
        recurse: yes

    - name: "6. 创建组(如不存在)"
      group:
        name: "{{ nfs_user }}"
        gid: "{{ nfs_gid | int }}"
        state: present

    - name: "7. 创建用户(如不存在)"
      user:
        name: "{{ nfs_user }}"
        uid: "{{ nfs_uid | int }}"
        group: "{{ nfs_user }}"
        shell: /sbin/nologin
        create_home: false
        state: present

    - name: "8. 修改目录属主"
      file:
        path: "{{ nfs_share_dir }}"
        owner: "{{ nfs_user }}"
        group: "{{ nfs_user }}"
        recurse: yes

    - name: "9. 生成 /etc/exports 配置"
      blockinfile:
        path: "{{ nfs_exports_file }}"
        create: yes
        block: |
          {{ nfs_share_dir }}  {{ nfs_network }}(rw,all_squash,anonuid={{ nfs_uid }},anongid={{ nfs_gid }},no_subtree_check)
      notify: reload nfs exports

    - name: "10. 自动检测系统中存在的 NFS 服务名(优先检测,再回退)"
      block:
        - name: 尝试扫描服务名
          shell: |
            systemctl list-unit-files | grep -E 'nfs-(kernel-server|server)\.service' | awk '{print $1}' | head -1 | sed 's/.service//'
          register: nfs_service_detect
          changed_when: false
          failed_when: false

        - name: 设置服务名变量
          set_fact:
            nfs_service_name: >-
              {{ nfs_service_detect.stdout | default(
                (ansible_distribution | lower is search('kylin')) | ternary('nfs',
                (ansible_os_family == 'Debian') | ternary('nfs-kernel-server', 'nfs-server'))
              ) }}

    - name: "11. 启动 rpcbind(通用)"
      systemd:
        name: rpcbind
        enabled: true
        state: restarted

    - name: "12. 启动并设置开机自启"
      systemd:
        name: "{{ nfs_service_name }}"
        enabled: true
        state: restarted

    - name: "13. 开放防火墙端口(RedHat 系)"
      block:
        - name: 检查 firewalld 是否运行
          command: systemctl is-active firewalld
          register: firewalld_status
          failed_when: false
          changed_when: false

        - name: 开放 NFS 所需端口
          command: >
            firewall-cmd --permanent --add-service={{ item }}
          loop:
            - nfs
            - rpc-bind
            - mountd
          when: firewalld_status.stdout == "active"

        - name: 重新加载防火墙
          command: firewall-cmd --reload
          when: firewalld_status.stdout == "active"
      when: ansible_os_family == "RedHat"

    - name: "14. 开放防火墙端口(Debian 系)"
      block:
        - name: 检查 UFW 是否启用
          command: ufw status
          register: ufw_status
          failed_when: false
          changed_when: false

        - name: 开放 111 和 2049 端口
          command: ufw allow {{ item }}
          loop:
            - 111/tcp
            - 111/udp
            - 2049/tcp
            - 2049/udp
          when: "'Status: active' in ufw_status.stdout"
      when: ansible_os_family == "Debian"

  handlers:
    - name: reload nfs exports
      command: exportfs -ra
cat ./group_vars/db/vars.yml
# 安装版本(可选 5.7 / 8.0 / 8.4)
mysql_version: "8.4"

# 根据版本选择安装包 URL
mysql_download_url: >-
  {% if mysql_version == "5.7" %}
  https://mirrors.aliyun.com/mysql/MySQL-5.7/mysql-5.7.36-linux-glibc2.12-x86_64.tar.gz
  {% elif mysql_version == "8.0" %}
  https://mirrors.aliyun.com/mysql/MySQL-8.0/mysql-8.0.27-linux-glibc2.12-x86_64.tar.xz
  {% elif mysql_version == "8.4" %}
  https://cdn.mysql.com/Downloads/MySQL-8.4/mysql-8.4.6-linux-glibc2.28-x86_64.tar.xz
  {% endif %}

# 文件名自动推导
mysql_tar_file: "{{ mysql_download_url | trim | basename }}"
mysql_dir_name: "{{ mysql_tar_file | regex_replace('\\.tar\\.(gz|xz)$', '')}}"

--------------------------------------------------------

cat templates/my.cnf.j2
[mysqld]
user=mysql
basedir=/app/tools/mysql/
datadir=/app/data/3306/
port=3306
socket=/var/run/mysql/mysql.sock

[client]
socket=/var/run/mysql/mysql.sock


----------------------------------------------------
# 作者:fanxuxu
# 说明:多系统一键安装 MySQL(支持 5.7 / 8.0 / 8.4)
# 使用:ansible-playbook -i hosts mysql_deployment.yml -K

- name: One-click install MySQL (multi-platform)
  hosts: all
  gather_facts: yes
  become: yes
  vars_files:
    - group_vars/all/vars.yml

  tasks:
    - name: 检查网络连通性
      ansible.builtin.command: ping -c 3 223.5.5.5
      register: ping_result
      ignore_errors: yes
    - name: 验证网络可用
      ansible.builtin.assert:
        that:
          - ping_result.rc == 0
        fail_msg: "网络不可用,请检查网络连接"

    - name: RedHat 系列安装依赖
      ansible.builtin.yum:
        name:
          - wget
          - ncurses
          - ncurses-devel
          - libaio
          - libaio-devel
          - openssl
          - openssl-devel
          - net-tools
        state: present
      when: ansible_os_family == "RedHat"

    - name: Debian 系列安装依赖
      ansible.builtin.apt:
        name:
          - wget
          - libncurses-dev
          - libaio-dev
          - libssl-dev
          - net-tools
        update_cache: yes
        state: present
      when: ansible_os_family == "Debian"


    - name: 创建目录
      ansible.builtin.file:
        path: "{{ item }}"
        state: directory
        owner: root
        group: root
        mode: "0755"
      loop:
        - /app/tools
        - /app/data/3306
        - /var/run/mysql

    - name: 创建 mysql 用户
      ansible.builtin.user:
        name: mysql
        shell: /sbin/nologin
        system: yes
        create_home: no

    - name: 下载 MySQL 安装包
      ansible.builtin.get_url:
        url: "{{ mysql_download_url }}"
        dest: "/tmp/{{ mysql_tar_file }}"
        mode: "0644"

    - name: 解压 MySQL 包
      ansible.builtin.unarchive:
        src: "/tmp/{{ mysql_tar_file | trim}}"
        dest: /app/tools/
        remote_src: yes
        creates: "/app/tools/{{ mysql_dir_name }}"

    - name: 创建软链接
      ansible.builtin.file:
        src: "/app/tools/{{ mysql_dir_name }}"
        dest: /app/tools/mysql
        state: link
        force: yes

    - name: 生成 MySQL 配置文件
      ansible.builtin.template:
        src: my.cnf.j2
        dest: /etc/my.cnf
        owner: mysql
        group: mysql
        mode: "0644"
        backup: yes

    - name: 设置环境变量
      ansible.builtin.copy:
        dest: /etc/profile.d/mysql.sh
        content: |
          export PATH=/app/tools/mysql/bin:$PATH
        mode: "0755"

    - name: 初始化数据库
      ansible.builtin.command:
        cmd: >
          /app/tools/mysql/bin/mysqld --initialize-insecure
          --user=mysql
          --basedir=/app/tools/mysql
          --datadir=/app/data/3306
      args:
        creates: /app/data/3306/auto.cnf

    - name: 安装服务脚本
      ansible.builtin.copy:
        src: "/app/tools/mysql/support-files/mysql.server"
        dest: /etc/init.d/mysqld
        remote_src: yes
        mode: "0755"

    - name: 修改 init 脚本路径
      ansible.builtin.lineinfile:
        path: /etc/init.d/mysqld
        regexp: '^basedir='
        line: 'basedir=/app/tools/mysql/'
      notify: Reload systemd

    - name: 修改 datadir
      ansible.builtin.lineinfile:
        path: /etc/init.d/mysqld
        regexp: '^datadir='
        line: 'datadir=/app/data/3306/'
      notify: Reload systemd

    - name: 创建 systemd 服务
      ansible.builtin.copy:
        dest: /etc/systemd/system/mysqld.service
        content: |
          [Unit]
          Description=MySQL Server
          After=network.target

          [Service]
          User=mysql
          Group=mysql
          Type=forking
          ExecStart=/etc/init.d/mysqld start
          ExecReload=/etc/init.d/mysqld restart
          ExecStop=/etc/init.d/mysqld stop
          PrivateTmp=true

          [Install]
          WantedBy=multi-user.target
        mode: "0644"
      notify:
        - Reload systemd
        - Enable and Start MySQL

    - name: 确保 /var/run/mysql 存在并有正确权限
      ansible.builtin.file:
        path: /var/run/mysql
        state: directory
        owner: mysql
        group: mysql
        mode: '0755'

    - name: 检查 MySQL 3306 端口
      ansible.builtin.wait_for:
        port: 3306
        delay: 5
        timeout: 30
        state: started
      ignore_errors: yes

    - name: 输出成功信息
      ansible.builtin.debug:
        msg:
          - "MySQL 已安装完成!"
          - "配置文件: /etc/my.cnf"
          - "安装目录: /app/tools/mysql"
          - "数据目录: /app/data/3306"
          - "日志请查看: /var/log/mysql_install.log"
          - "请运行 'source /etc/profile' 激活 PATH"
          - "root 密码为空,请尽快设置:mysqladmin -u root password '强密码'"

  handlers:
    - name: Reload systemd
      ansible.builtin.systemd:
        daemon_reload: yes

    - name: Enable and Start MySQL
      ansible.builtin.systemd:
        name: mysqld
        enabled: yes
        state: started
#检查nginx脚本
check_ngx.sh.j2
#!/bin/bash
#1.vars
name=nginx
#2.
count=`ps -ef | grep nginx |egrep -v 'grep|color' |wc -l`
if [ $count -eq 0 ];then
        systemctl stop keepalived
        #配置邮件,切换节点通知
fi
----------------------------------------------
keepalived.conf.j2
global_defs {
    router_id {{ansible_hostname}}
}
vrrp_script check_ngx.sh {
   script /server/scripts/check_ngx.sh
   interval 2
   weight  1
   user root
}
vrrp_instance vip_3 {
  {% if ansible_hostname == "lb01" %}
    state MASTER
    priority 100
  {% elif ansible_hostname == "lb02" %}
    state BACKUP
    priority 50
  {% endif %}
    interface ens33
    virtual_router_id 51
    advert_int 1
    authentication {
        auth_type PASS
        auth_pass 1111
    }
    virtual_ipaddress {
        10.0.0.3 dev ens33 label ens33:0
    }
    track_script {
      check_ngx.sh
    }
}
-------------------------------------------------------
keepalived_depolyment.yml
- name: keepalived_deployment
  gather_facts: yes
  hosts: all
  tasks:
    - name: 1.1红帽安装keepalived
      yum:
        name: keepalived
        state: latest
      when: ansible_distribution is match("Kylin|Centos|Rocky")

    - name: 1.2Debian安装keepalived
      apt:
        name: keepalived
        state: latest
      when: ansible_distribution is match("Debian|Ubuntu")

    - name: 2.分发配置文件
      template:
        src: ./templates/keepalived.conf.j2
        dest: /etc/keepalived/keepalived.conf
        backup: true
      notify:
        - 'restart_keepalived'

    - name: 3.分发检测nginx状态脚本
      template:
        src: ./templates/check_ngx.sh.j2
        dest: /server/scripts/check_ngx.sh
        backup: true

    - name: 4.启动keepalived服务
      systemd:
        name: keepalived
        enabled: yes
        state: started
  handlers:
    - name: 'restart_keepalived'
      systemd:
        name: keepalived
        state: restarted
roles:ansible 目录规范
└── roles/
    ├── group_vars/
    │   ├── all/
    │   │   └── vars.yml
    │   ├── ubt/
    │   │   └── vars.yml
    │   └── web/
    │       └── vars.yml
    ├── hosts
    ├── rsync_client/
    │   ├── file/
    │   ├── handlers/
    │   ├── tasks/
    │   └── templates/
    │       └── cron+rsync_backup.sh.j2
    ├── rsync_server/
    │   ├── file/
    │   ├── handlers/
    │   │   └── main.yml
    │   ├── tasks/
    │   │   └── main.yml
    │   └── templates/
    │       └── rsyncd.conf.j2
    └── top.yml
ansible 优化
1. ssh 优化 UseDNS no
defaults 模块:
2. facts 系统变量收集 关闭 gathering = explicit
3. 并发处理,forks=10
4. 如果开启变量收集,可使用 redis 缓存配置
  gathering = implicit
  fact_caching = redis
  fact_caching_connection=172.16.1.51:6379
5. 可设置默认主机清单:inventory= ./hosts
  echo 'export ANSIBLE_INVENTORY=./hosts' >>/etc/profile
  source /etc/profile
#主机清单/敏感变量的加密
加密操作:ansible-vault encrypt 目标文件
执行加密剧本:ansible-playbook --ask-vault-pass 剧本名。
解密操作:ansible-vault decrypt 已加密文件
-----------------------------------
#Ansible 权限提升配置(ansible.cfg 中 [privilege_escalation] 段)
管理端配置与操作:
1.批量配置被管理端 sudo 权限:
ansible -i hosts all -m shell -a 'echo "ans ALL=(ALL) NOPASSWD: ALL" >>/etc/sudoers'
2.批量创建普通用户ans
ansible -i hosts all -m shell -a 'useradd ans'
3.批量设置ans用户密码
ansible -i hosts all -m shell -a 'echo Lidao996 | passwd --stdin ans'
4.ansible.cfg配置(/etc/ansible/ansible.cfg)
[defaults]段:
sudo_user = ans # 被管理端具有sudo权限的用户(配置了NOPASSWD: ALL)
remote_user = ans # 连接被管理端使用的用户
remote_port = 22 # 被管理端SSH端口
host_key_checking = False # 关闭SSH主机密钥检查
log_path = /var/log/ansible.log # 日志路径
[privilege_escalation]段:
become=True # 开启sudo权限提升
become_method=sudo # 使用sudo命令提权
become_user=root # 提权到root用户
被管理端配置与操作:
1.sudo 权限配置
ans ALL=(ALL) NOPASSWD: ALL # ans用户无密码执行所有sudo命令,SSH端口22,密码为1
2.SSH 密钥分发(所有节点执行)
ssh-copy-id ans@10.0.0.7
3.连通性测试
4.ansible all -m ping # 测试所有被管理端连通性
关闭 root 远程登录(修改 SSH 配置)
编辑配置文件:/etc/ssh/sshd_config
设置:PermitRootLogin=no
测试特定主机组(示例):ansible -i hosts web -m ping
升级 python
#m01-批量管理python升级---------------------------
#1.安装依赖:
yum install -y gcc openssl-devel bzip2-devel libffi-devel zlib-devel

#2.下载python安装包(去官网下载上传到主机)
#3.解压并进入目录
tar xf Python-3.11.14.tar.xz
cd Python-3.11.14/

#4.编译安装 - 配置
./configure --enable-optimizations --with-ssl

#5.编译 - 生成二进制文件
make install

#6.安装(创建目录、复制文件等操作)
make install

#升级后安装 Ansible 步骤:
#1.升级 pip
python3 -m pip install -i https://mirrors.tuna.tsinghua.edu.cn/pypi/web/simple --upgrade pip

#2.配置 pip 源(加速下载)
pip3 config set global.index-url https://mirrors.tuna.tsinghua.edu.cn/pypi/web/simple

#3.安装 Ansible
pip3 install ansible

#4.Ansible 配置文件修改(/etc/ansible/ansible.cfg)
[defaults]
interpreter_python=/usr/local/bin/python3  # 管理端需确认python3的实际路径

-----------------------------------------------------------------------
#被管理机器也需要更新python
1.也是基于 ssh 密钥连接
2.yum -y install pssh    #其中包含 pssh,pscp,
3.分发脚本:pscp.pssh -h pssh-hosts /server/scripts/update_python.sh ~/
-h pssh-hosts     #指定主机清单
-P       #显示过程
-t       #设置超时时间
脚本:
[root@m01 ~]# cat /server/scripts/update_python.sh
#!/bin/bash
##############################################################
# File Name: /server/scripts/update_python.sh
# Version: V1.0
# Author: fanxuxu
# Organization: www.fanxuxu.top
# Description:
##############################################################
export LANG=en_US.UTF-8
export PATH=/app/tools/mysql/bin:/app/tools/openssh/bin/:/app/tools/openssh/sbin/:/app/tools/openssh/libexec/:/usr/local/sbin:/usr/bin:/bin:/usr/sbin:/sbin:/app/tools/openssh-9.9p2/bin

#1.解压
tar xf Python-3.11.14.tar.xz
cd Python-3.11.14

#2.安装依赖
yum install -y gcc openssl-devel bzip2-devel libffi-devel zlib-devel

#升级python到 python 3.11
#解压,进入目录

#编译安装-配置
./configure --enable-optimizations --with-ssl
#--enable-optimizations自动进行优化(python)
#--with-ssl支持ssl模块,功能。

#编译-生成二进制文件
make -j `nproc`
#安装 创建目录,复制文件等操作.
make install

4.批量执行:pssh -t 0 -h pssh-hosts bash ~/update_python.sh

评论交流
欢迎留下你的想法